
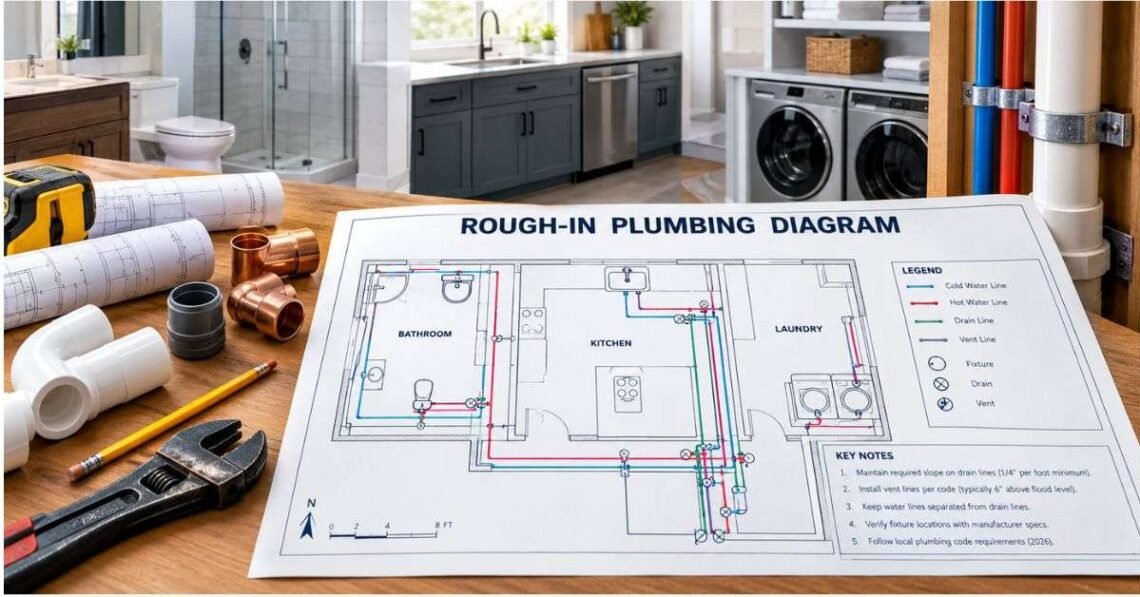
Planning a new bathroom, kitchen, or laundry room? At some point, you’re going to hear the term “rough-in.” Before any pipe goes into the wall or floor, most plumbing inspectors want to see a simple drawing that shows where every pipe, drain, and vent will go. This drawing is called a rough-in plumbing diagram, and it’s one of the most important papers in any plumbing project.
This guide explains what this diagram is, why it matters, how to read one, and how to make your own — even if you’ve never drawn one before. We’ll keep the language simple, add easy-to-scan tables, and answer the questions homeowners ask most. Whether you’re a DIYer applying for a permit, a student learning the trade, or a homeowner just trying to understand your contractor’s paperwork, this article gives you everything in one place, updated for 2026 plumbing codes and practices.
By the end, you’ll know what to look for, what mistakes to avoid, and when it’s smarter to call in a licensed plumber.
What Is a Rough-In Plumbing Diagram
A rough-in plumbing diagram is a drawing that shows all the pipes in a home’s plumbing system before the walls, floors, or fixtures are installed. It maps out drain lines, vent pipes, and water supply lines, along with their sizes and how they connect.
Most of these drawings are drawn in a 3D style called isometric. This style makes flat pipes on paper look like they have depth, so an inspector can understand how pipes run up, down, and sideways through a wall or floor. Solid lines usually show pipes carrying water or waste. Dashed lines usually show vent pipes, which only carry air.
Think of it like a map of your home’s hidden “plumbing skeleton.” Just like an electrician needs a wiring diagram, a plumber needs this drawing to make sure every pipe is placed correctly, sloped the right way, and connected using legal fittings.
This diagram is created during the “rough-in stage” of construction — the phase after framing is done but before drywall goes up. At this point, all pipes are visible and easy to check, which is exactly why inspectors want a clear drawing to compare against the real installation.
Why This Diagram Matters for Every Project

Skipping this step, or drawing it carelessly, can cause real problems:
- It gets your permit approved faster. Most building departments require this drawing before they issue a plumbing permit.
- It prevents code violations. Inspectors compare the drawing to the actual pipes. Mistakes are caught on paper, not after the concrete is poured.
- It saves money. Fixing a pipe before it’s covered by drywall or a slab is far cheaper than tearing out finished walls later.
- It keeps everyone on the same page. Plumbers, electricians, and general contractors all use it to avoid pipe, wire, and duct clashes.
- It protects resale value. Homes with proper permits and passed inspections are easier to sell without surprises during a buyer’s inspection.
In short, this small sketch protects your budget, timeline, and safety for years to come.
Key Symbols and Lines You’ll See
Reading a plumbing layout is much easier once you know the basic symbols. Here’s a quick breakdown:
| Symbol or Line Type | What It Means |
|---|---|
| Solid line | Pipe carrying water or waste |
| Dashed line | Vent pipe (air only, no water) |
| Circle with a “T” shape | Toilet flange connection |
| Small triangle or wedge | Fitting such as an elbow or wye |
| Numbers next to a line | Pipe diameter in inches (e.g., 2″, 3″, 4″) |
| Arrow along a pipe | Direction of water or waste flow |
Every pipe segment should be labeled with its size, since diameter affects both drainage speed and code compliance. A kitchen sink drain, for example, is usually smaller than a toilet drain, because toilets carry solid waste and need more room.
Two Main Systems: Drain-Waste-Vent and Water Supply
Every home plumbing layout is really two separate systems working together.
The Drain-Waste-Vent (DWV) system carries used water and waste out of the house and lets air into the pipes so water flows smoothly, without gurgling or trap siphoning. This includes toilet drains, sink drains, shower drains, and the vent pipes that usually run up through the roof.
The water supply system brings fresh, pressurized water into fixtures like sinks, tubs, toilets, and washing machines. These lines are usually copper, PEX, or CPVC, and they’re drawn separately from the drain lines, often with their own color or line style if the drafter uses one.
A complete plan should show both systems clearly, along with how new pipes tie into the existing plumbing already in the house.
Visual Guide: Rough-In Measurements and Inspection Checklist
Two of the most useful references during this stage are standard rough-in measurements and the inspector’s checklist. Here they are in table form for quick scanning.
Common Rough-In Measurements (Residential)
| Fixture | Typical Rough-In Height/Distance | Notes |
|---|---|---|
| Toilet drain (from finished wall) | 12 inches | Standard for most toilets |
| Sink drain | 18–20 inches from floor | Varies by vanity height |
| Shower/tub drain | Centered in unit | Must match fixture manufacturer specs |
| Water supply lines (sink) | 20–22 inches from floor | Hot on left, cold on right |
| Washing machine box | 42–48 inches from floor | Check local code |
What Inspectors Typically Check
| Inspection Point | Why It Matters |
|---|---|
| Pipe size matches drawing | Confirms correct drainage capacity |
| Correct slope on drain pipes | Prevents standing water and clogs |
| Vent pipes present and sized right | Stops sewer gas and slow drains |
| Fittings used correctly (no illegal 90° turns on horizontal drains) | Avoids future clogs and code failure |
| Pressure test on supply lines | Checks for leaks before walls close |
How to Read a Rough-In Diagram Step by Step
If you’re new to this, follow the pipes like a story, from the fixture to the sewer.
- Start at a fixture symbol, such as a toilet or sink, and find where its drain line begins.
- Follow the solid line to see where waste travels — usually downward and toward a main stack.
- Look for dashed lines branching off nearby. These are the vents that keep air moving so traps don’t lose their water seal.
- Check the numbers along each pipe segment to confirm diameter.
- Trace the main stack down to where it connects to the home’s main sewer or septic line, and up to where it exits the roof.
Once you understand a rough-in plumbing diagram in this step-by-step way, even a complex bathroom layout becomes easy to follow in just a few minutes.
How to Draw Your Own Diagram
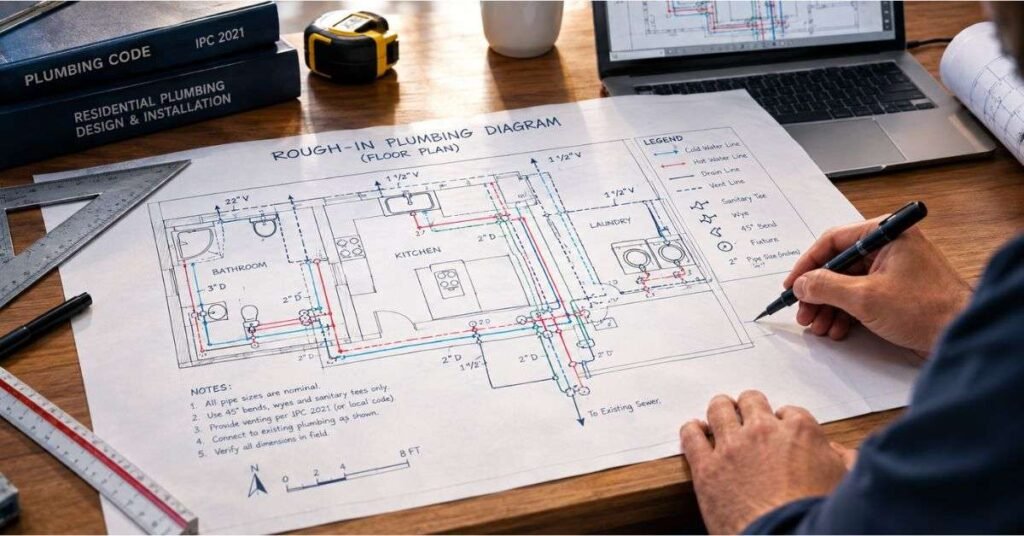
You don’t need to be a professional artist to sketch a rough-in plumbing diagram. Here’s a simple approach:
Sketch the floor plan first, marking where each fixture will sit.
Draw drain lines from each fixture toward the main stack, using solid lines.
Add vent lines using dashed lines, showing how each fixture connects to fresh air, either through a shared vent or its own.
Label every pipe size clearly next to the line.
Mark fittings at every turn — a 45-degree bend, a wye, or a sanitary tee — instead of drawing sharp, illegal 90-degree turns on horizontal runs.
Show connections to existing plumbing, since inspectors need to see how new work ties into what’s already there.
Many people use a 30-60-90 drafting triangle for hand drawings, since it creates the angled, 3D “isometric” look inspectors expect. Others now use simple design software, which we cover later in this guide.
Common Mistakes That Cause Failed Inspections
Even careful homeowners make these errors. Watch out for:
- Missing pipe sizes. An unlabeled pipe is one of the top reasons drawings get rejected.
- Illegal fittings. Using a straight 90-degree fitting on an underground or horizontal drain is against code in nearly every area.
- Forgetting the vent system. A drain without a proper vent can cause slow drainage, gurgling, and sewer gas smells.
- Wrong slope. Drain pipes usually need about a quarter-inch of drop per foot; too little or too much causes clogs.
- Not showing tie-ins. Forgetting to show how new pipes connect to the existing system confuses both the inspector and the plumber doing the install.
Catching these issues on paper, before pipes are installed, is far cheaper than fixing them after drywall is up.
Tools, Apps, and Software for 2026
While hand-drawn sketches are still accepted by many building departments, more people now use digital tools:
- Simple CAD apps built for home plumbing, with drag-and-drop fixture symbols.
- Tablet sketch apps that draw isometric lines with snapping guides, like a digital drafting triangle.
- Free templates from some local plumbing departments showing exactly how a compliant drawing should look.
- 3D home design software that some contractors use to auto-generate a rough layout from a floor plan.
Whatever tool you choose, the goal stays the same: a clear, labeled, easy-to-follow layout that matches your local code.
When to Hire a Professional Plumber

Some projects are simple enough to sketch yourself, such as a bathroom remodel using existing drain lines. But call a licensed plumber if:
- You’re adding a new bathroom or kitchen far from existing lines.
- Your code office requires a licensed professional’s stamp on the drawing.
- You’re unsure about venting, slope, or fitting rules in your area.
- The project involves a septic system instead of a public sewer.
A professional can also catch problems beginners miss, like vent sizing for cold climates or fixture unit calculations required by local code.
Frequently Asked Questions
Is a rough-in plumbing diagram required for a permit
In most areas, yes — building departments use it to review your plumbing before pipes are installed.
Can I draw one myself as a homeowner
Yes, many jurisdictions allow homeowner-drawn diagrams for simple projects, as long as it’s clear and accurate.
What’s the difference between rough-in and finish plumbing
Rough-in is the hidden pipe stage before walls close; finish plumbing is installing visible fixtures like faucets and toilets afterward.
Why are some lines dashed and others solid
Dashed lines represent vent pipes carrying air, while solid lines represent pipes carrying water or waste.
How much does professional rough-in plumbing cost
Costs vary widely by region and fixture count, so it’s best to get local quotes; national cost guides can offer a rough starting estimate.
Conclusion
A rough-in plumbing diagram might look like a simple sketch, but it plays a big role in keeping your plumbing project safe, legal, and affordable. It helps inspectors approve your permit faster, helps plumbers avoid costly mistakes, and gives you a clear record of what’s hidden behind your walls. Whether you sketch it by hand with a drafting triangle or use modern design software, the goal is the same: clear labels, correct pipe sizes, proper venting, and connections that follow your local code.