
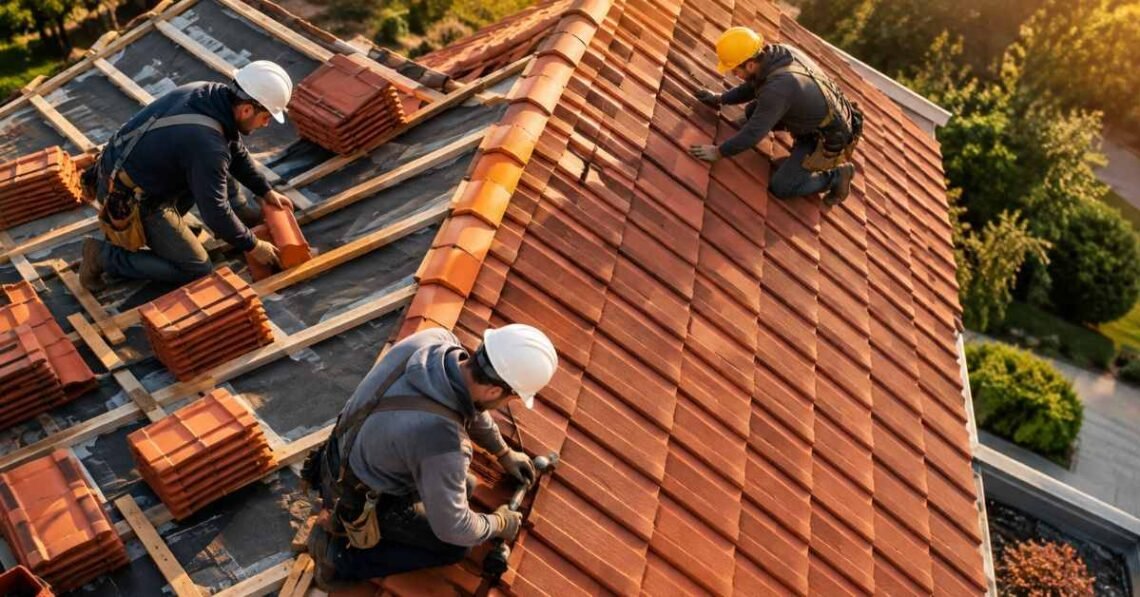
Red clay tile Roof Installation has covered homes for thousands of years, and it still looks great in 2026. The warm orange-red color, the curved shapes, and the long life make it a favorite for many homeowners. But a tile roof is heavy, and small mistakes can cause leaks later. That is why a clear plan matters.
This guide explains how installing red clay tile works, step by step, in plain words. You will learn what tools to buy, how to check your roof, how to lay each row, and how to finish the ridge. You will also see simple tables for cost, time, and tile types.
The advice here follows common practices from tile makers, building codes, and safety groups. It also includes field tips that roofers often share, such as mixing tiles from several boxes for an even color. Read the whole guide first, then decide if you want to do the work yourself or hire a licensed roofer. Either way, you will know what good work looks like.
What Red Clay Tile Is and Why Homeowners Choose It
Clay tile is made from natural clay that is shaped and baked in a very hot oven called a kiln. The heat turns soft clay into hard, strong tile. The red color comes from iron in the clay, so it does not fade like paint. That is why old tile roofs in Spain, Italy, and Mexico still look rich today.
Most clay roofs last 50 to 100 years when they are installed well. They resist fire, insects, rot, and strong sun. Many tiles also let air move under them, which helps keep the attic cooler. The U.S. Department of Energy explains how cool roofing can lower heat in a home, and tile can be a good fit in warm places.
There are a few common shapes. Barrel (also called Spanish or mission) tiles look like half-pipes. S-tiles have a gentle wave. Flat tiles look more modern. Each shape has its own rules for spacing and fastening, so always follow the maker’s instructions.
The trade-off is weight and price. Clay tile costs more than shingles, and your roof must be strong enough to hold it. The next section shows how to check that.
Check Your Roof Before You Begin
Before you buy anything, look at the roof structure. Clay tile can weigh 600 to 1,000 pounds per roofing square (a square is 100 square feet). Standard asphalt shingles weigh far less. If your frame was built for light shingles, it may need extra support.
Start with these checks:
- Roof pitch: Most clay tile needs at least a 4:12 slope. Lower slopes need special underlayment and maker approval.
- Roof deck: The plywood or boards must be dry, flat, and solid. Replace any soft or damaged spots.
- Rafters and trusses: Ask a structural engineer or licensed roofer to confirm they can carry the extra load.
- Local rules: Many cities require a permit. Some areas also have wind, fire, or earthquake rules for tile.
Learn how installing red clay tile starts long before the first tile goes up. Skipping this check is the most costly mistake people make. Fixing a sagging roof after the fact can cost more than the tile itself.
If your home is old, take photos of the attic and the roof edges. Share them with your roofer or engineer. Good records also help with insurance later. For more help with older roofs, see our roof inspection checklist.
Tools and Materials You Will Need

Having everything ready saves time and prevents mistakes. Here is a simple list for most clay tile jobs.
Tools:
- Wet saw with a diamond blade, or an angle grinder with a masonry blade
- Tape measure, chalk line, and level
- Cordless drill and hammer
- Tin snips and a utility knife
- Roofing nail gun or hand nailer
- Tile nippers for small cuts
- Padded tile hoist or roof ladder
Materials:
- Clay tiles (order 5 to 10 percent extra for cuts and breaks)
- Synthetic or high-temperature underlayment
- Wood or metal battens (counter-battens if the maker asks for them)
- Corrosion-resistant nails or screws, such as stainless steel or copper
- Metal flashing for valleys, walls, and chimneys
- Ridge and hip tiles, plus end caps
- Roofing sealant or mortar, as the maker recommends
Buy all tiles at the same time if you can. Color can change a little from one batch to another. Open several boxes and mix tiles as you lay them so the roof looks even. Keep the leftover tiles in a dry place. You may need them for repairs years from now.
Safety Steps That Protect You and Your Roof
Roof work is dangerous, and clay tile adds extra risk. Wet or dusty tile can be slippery. A broken piece can be sharp. Falls are a leading cause of serious injury in construction, so take safety seriously. The Occupational Safety and Health Administration shares clear advice on fall protection that every roofer should read.
Follow these safety rules:
- Wear a safety harness tied to a strong anchor point.
- Use shoes with soft, non-slip soles.
- Wear gloves, safety glasses, and a dust mask when cutting tile.
- Never work on a wet roof or in strong wind.
- Keep ladders on firm ground and tie them off at the top.
- Do not stack too many tiles in one place. Spread the weight across the roof frame.
Walk on tile the right way. Step near the lower, overlapped part of the tile and keep your weight over the rafters. Walking in the middle of a tile can crack it. Many roofers use padded walk boards to protect the surface.
If you are not comfortable on a steep roof, hire a pro. No savings are worth a serious injury.
Step One: Install the Underlayment and Flashing
The underlayment is your real waterproof layer. Tiles shed most water, but wind-driven rain can sneak underneath. The underlayment catches that water and sends it down to the gutters.
Start by cleaning the roof deck. Remove old nails and debris. Then roll out the underlayment from the bottom edge up, overlapping each row by the amount the maker states (often 4 to 6 inches). Fasten it flat with no wrinkles. Many roofers in 2026 use high-temperature synthetic underlayment because it handles sun and heat better than old felt paper.
Next, add flashing. This is thin metal that guides water away from weak spots. Install it in these places:
- Valleys: Use wide metal pans that carry water down the roof.
- Chimneys and walls: Use step flashing and counter flashing.
- Vents and pipes: Use flashing boots made for tile roofs.
- Eaves and rakes: Add drip edges so water leaves the roof cleanly.
Seal every nail hole that is exposed. Most leaks on tile roofs come from flashing problems, not from the tiles. Take your time here, because every later step depends on it.
Step Two: Set the Battens and Plan Your Layout
Battens are thin strips of wood or metal that hold the tiles in place. Their spacing decides how each row of tile will sit, so measure with care.
First, check the tile maker’s guide. It gives the exact “exposure,” which is how much of each tile shows after overlap. Mark the roof with a chalk line at the top and bottom of each batten row. Do not guess. Even a small error grows over many rows and leaves crooked lines.
Then install the battens. Nail them to the rafters, not just the deck, if the plan requires it. Leave small gaps at the bottom of the roof for air to flow. Some systems use counter-battens that lift the main battens slightly. This lets water and air move freely under the tile.
Before you lay anything, do a “dry run.” Place a few tiles in a row without fastening them. Check that the pattern lines up at the roof edges and around vents. Plan where cut tiles will go so they are not in the most visible spots.
This is also the time to carry tiles to the roof. Place them in small piles over the rafters, not at the center of the span.
Step Three: Lay the Red Clay Tiles Row by Row
Now comes the most visible part of the job. Many roofers start at the bottom corner and work upward, laying from one side to the other. Some start at the center for balance on wide roofs. The maker’s guide will tell you what is best.
Follow this basic method:
- Hang the first row at the eave, using the special starter or eave closure pieces.
- Set each tile on its batten and lock it into the one beside it.
- Fasten tiles with nails, screws, or clips as the plan requires. Wind areas often need every tile fastened.
- Keep rows straight by checking your chalk lines often.
- Mix tiles from several boxes to blend the color.
Do not overdrive nails. Tight nails can crack the tile. Leave a tiny bit of room so the tile can expand and shrink with heat.
When you reach vents, valleys, and edges, measure each cut twice. Use a wet saw to keep dust low and the cut clean. Smooth rough edges with a stone. In case of rain, stop work and cover the open roof so water cannot get in.
If you need help picking colors, see our guide to roof color choices.
Step Four: Finish the Hips, Ridges, and Edges
The ridge is the top line of the roof, and hips are the sloped lines where two roof sides meet. These areas need special tiles that cap the joints and keep water out.
Install a ridge board or batten first if the plan calls for it. Then set the ridge tiles in a straight line. Many modern systems use dry-fit ridge vents with clips or screws. Older methods use mortar, which can crack as the house moves. Today, roofers often choose flexible sealants or mechanical fasteners because they last longer and are easier to repair.
Next, add end caps and edge pieces at the rakes (the sloped edges of the roof). These stop wind from lifting the tiles. Check the maker’s rules for fastening, since wind zones have different needs.
Finally, do a full walk-through:
- Look for cracked or loose tiles.
- Confirm every flashing is sealed.
- Clear dust and chips from gutters and valleys.
- Take photos for your records and warranty.
Ask for a final inspection if your city requires one. Many tile makers also offer a written warranty if the roof was installed by a certified contractor. Keep the receipts and photos.
Visual Guide: Quick Charts for Planning
Charts make planning easier. Use these tables as a quick reference. Prices are rough 2026 estimates in U.S. dollars and can change by region and supplier.
Common Clay Tile Types
| Tile Type | Look | Best For | Typical Weight per Square |
|---|---|---|---|
| Barrel (Spanish) | Half-pipe curves | Mediterranean and ranch homes | 800–1,000 lbs |
| S-Tile | Gentle wave | Many styles | 600–900 lbs |
| Flat Tile | Smooth, modern | Contemporary homes | 600–800 lbs |
| Mission | Rustic, deep curves | Historic and desert homes | 850–1,000 lbs |
Project Timeline and Effort
| Step | Task | Time for a 2,000 sq ft Roof (Crew of 3–4) |
|---|---|---|
| 1 | Inspection and permits | 1–2 weeks |
| 2 | Underlayment and flashing | 1–2 days |
| 3 | Battens and layout | 1–2 days |
| 4 | Laying tiles | 4–7 days |
| 5 | Ridge, hips, and cleanup | 1–2 days |
Tools Checklist
| Tool | Why You Need It |
|---|---|
| Wet saw | Clean, low-dust cuts |
| Chalk line | Straight rows |
| Harness | Fall safety |
| Drill and nail gun | Fast, steady fastening |
Cost, DIY or Pro, and Long-Term Care

Clay tile is a long-term purchase. In 2026, many homeowners pay roughly $15 to $30 per square foot for a full installed roof. Prices depend on tile type, roof shape, and local labor. Expect extra costs if the roof needs structural support.
Can you do it yourself? A skilled DIY builder with the right tools can handle small jobs, such as sheds or porches. But a full house roof is hard work. Tiles are heavy, mistakes are expensive, and some warranties need a certified installer. If you want the full lifetime promise, hire a licensed pro. Ask for proof of insurance, local references, and a written estimate. Learn how installing red clay tile works so you can ask smart questions and spot weak work.
After the job, a little care goes a long way:
- Check the roof twice a year and after big storms.
- Replace cracked tiles quickly.
- Keep gutters and valleys clear of leaves.
- Avoid walking on the roof when you can.
- Have a pro inspect the flashing every few years.
Our roof maintenance tips explain this routine in more detail.
Frequently Asked Questions
How long does a red clay tile roof last
With good installation and care, it can last 50 to 100 years.
Can I put clay tile over my old shingles
No. Remove the old layers first so the deck can be checked and the load stays safe.
Is clay tile good for hot weather
Yes. It resists heat and sun, and air gaps under the tile can help keep the attic cooler.
Do I need a permit for a tile roof
Most cities do require one, so check with your local building office before you start.
What is the most common cause of tile roof leaks
Poor flashing and damaged underlayment cause more leaks than the tiles themselves.
Conclusion
A red clay tile roof can protect your home for generations and give it a warm, classic look. The key points are simple: check that your roof can hold the weight, stay safe, build a watertight base, set the battens with care, and lay each row with patience. When you finish the ridge and flashing well, the roof will stay strong through sun, wind, and rain.
Whether you plan to work with a crew or just want to learn how installing red clay tile is done, this guide gives you a solid starting point. Use the tables above to plan your budget and schedule, and always follow your tile maker’s rules and local building codes.
Ready to move forward? Start today by checking your roof’s condition and asking two or three licensed roofers for written quotes. Compare their plans, ask questions, and choose the one who explains the work clearly. A good start now saves money and stress later.